
Replacing Furniture Webbing Straps: Complete DIY Repair Guide
Bring your sagging patio chairs, lawn chairs, and outdoor seating back to life. Learn how to replace worn webbing straps with durable, weather-resistant materials and professional-grade techniques.
Start the RepairWhy this matters: Sagging, cracked, or frayed webbing straps are the most common reason outdoor chairs get retired before their frames give out. In most cases, the metal or wood frame is still perfectly solid — only the webbing has failed. Replacing the webbing yourself costs a fraction of buying new furniture and typically takes just two to three hours per chair. This guide walks you through material selection, tools, and a step-by-step installation process so you can restore comfortable, safe seating for years to come.
What Are Furniture Webbing Straps?
Furniture webbing straps are the flexible bands stretched across the seat and back of patio chairs, lawn chairs, and some sofa frames to support cushions or provide direct seating. They are typically made from woven synthetic materials such as polypropylene, polyester, or elastic rubber compounds. Over time, UV exposure, moisture, temperature swings, and body weight cause the straps to stretch, crack, fade, or break entirely. When one strap fails, the load shifts to the remaining straps, accelerating the failure of the whole seat.
Understanding the type of webbing your furniture uses is the first step. If you are unsure whether your frame is worth restoring, our guide on wicker vs metal outdoor furniture and weather-resistant outdoor furniture can help you assess durability before you invest in replacement materials. For wooden frames specifically, reviewing cedar wood outdoor furniture characteristics will tell you whether the frame itself can handle another decade of use.
Signs You Need to Replace Your Webbing
Not every sagging seat requires a full webbing replacement. Here are the clear indicators that it is time to act:
- Visible cracks or splits in the strap material, especially near the attachment points.
- Permanent stretching that does not recover when weight is removed.
- Fading and brittleness — straps that snap instead of flex when you press them.
- Broken or missing straps that leave gaps in the seat support.
- Uneven seating where one side sinks lower than the other.
- Fraying at the frame attachment where the strap wraps around or clips into the frame.
If your furniture uses cushions over the webbing, also check the cushion condition. Replacing webbing is often the right time to upgrade to waterproof outdoor seat cushions or waterproof outdoor lounge chair cushions for better comfort and moisture resistance.
Tools and Materials You Will Need
Gathering the right supplies before you start prevents mid-project delays. Here is what a typical webbing replacement job requires:
Replacement Webbing
Choose UV-resistant polypropylene or elastic webbing sized to match your frame width. Sold in rolls or pre-cut lengths. Expect to pay $15–$40 per roll depending on width and length.
Staples or Fasteners
Stainless steel staples (for wood frames) or replacement clips/screws (for metal frames). Rust-proof hardware is essential for outdoor use.
Staple Gun or Rivet Tool
A heavy-duty staple gun for wood frames, or a rivet gun and drill for metal frames. Match the tool to your frame material.
Measuring Tape & Marker
For accurate strap spacing and length. A fabric marker or chalk works best on webbing.
Utility Knife & Scissors
For trimming old webbing and cutting new straps to length. A rotary cutter also works well.
Pliers & Screwdriver
For removing old staples, clips, or screws. A staple remover or flathead screwdriver is helpful.
Pro Tip: Before removing the old webbing, take a photo of the original pattern and spacing. This reference prevents guesswork when installing the new straps and ensures the seat feels the same as the original design.
Step-by-Step Webbing Replacement Process
Follow these steps carefully to achieve a tight, professional-looking result. The entire process typically takes 2–3 hours per chair.
Remove the Old Webbing
Use pliers or a staple remover to pull out old staples, clips, or screws. Work carefully to avoid damaging the frame. Discard all old webbing — do not reuse stretched or cracked straps. Clean the frame surface with a damp cloth and let it dry completely.
Inspect and Prepare the Frame
Check for rust, splinters, or sharp edges that could tear new webbing. Sand rough spots and apply a rust-inhibiting primer or touch-up paint if needed. If your frame is wood, consider applying a moisture sealant — see our wood furniture moisture sealing guide for best practices.
Measure and Cut New Straps
Measure the distance across the frame plus 4–6 inches of overlap on each end for wrapping or stapling. Cut straps slightly longer than needed — you can always trim excess later. For elastic webbing, account for stretch by cutting 5–10% shorter than the measured span.
Plan Your Webbing Pattern
Decide on the weave pattern: horizontal only, vertical only, or a basket-weave (over-under) pattern for maximum support. Most patio chairs use parallel straps running side-to-side or front-to-back. Mark spacing on the frame with a pencil — typically 2–3 inches apart for seat support.
Attach the First Strap
Starting at one edge, secure the webbing to the frame using your chosen method. For wood frames, fold the strap end under itself and staple with stainless steel staples every 1/2 inch across the width. For metal frames, use clips or rivets according to the frame design. Pull the strap taut as you work.
Stretch and Secure the Opposite End
Pull the webbing across the frame with firm, even tension. A helper makes this step easier. Secure the far end the same way as the first. The strap should have slight give but no sagging. Test by pressing with your hand — it should feel firm and supportive.
Repeat for All Straps
Continue installing straps one at a time, maintaining consistent spacing and tension. For basket-weave patterns, alternate over-under as you go. Work from the center outward or edge to center — whichever keeps your spacing most consistent.
Trim Excess and Finish
Trim any overhanging webbing ends close to the staples or clips. If desired, cover exposed staple lines with a finishing strip or fold the webbing under for a cleaner look. Wipe the frame clean and test the seat with your full weight before placing cushions back on.
Choosing the Right Replacement Webbing
The material you choose directly affects comfort, durability, and appearance. Here is a comparison of the most common options:
- Polypropylene webbing: The most affordable option, available in many colors. Resistant to moisture and UV but less elastic. Best for chairs that use cushions on top. Cost: $15–$25 per roll.
- Elastic (rubber) webbing: Provides a softer, more forgiving seat. Ideal for chairs without cushions. Slightly more expensive and can degrade faster in intense sun. Cost: $25–$40 per roll.
- Polyester webbing: A middle-ground option with good UV resistance and moderate elasticity. Durable and colorfast. Cost: $20–$35 per roll.
- Pre-cut webbing kits: Convenient for common chair sizes, often including clips and instructions. Cost: $20–$50 per kit.
For outdoor furniture that will be exposed to rain and sun year-round, prioritize UV-resistant and waterproof materials. Our UV-resistant fabric guide and outdoor fabric selection guide provide detailed criteria for evaluating weather resistance in outdoor textiles.
Cost Breakdown: DIY vs Professional Replacement
Understanding the cost difference helps you decide whether to tackle this project yourself or hire a professional.
- DIY materials: $20–$60 per chair (webbing, staples, hardware)
- DIY total time: 2–3 hours per chair
- Professional re-webbing service: $75–$150 per chair (labor + materials)
- New replacement chair: $80–$300+ per chair
For most standard patio and lawn chairs, DIY replacement saves 50–70% compared to professional service and 60–80% compared to buying new. The skills required are basic — if you can use a staple gun, you can complete this project.
Tips for a Professional-Quality Result
- Maintain consistent tension: Uneven tension causes one side of the seat to sag. Use a helper or clamp to hold the webbing taut while you fasten it.
- Use rust-proof hardware: Standard staples will rust within one season. Always choose stainless steel or galvanized fasteners for outdoor furniture.
- Work in warm conditions: Elastic webbing is easier to stretch and position when temperatures are above 60°F (15°C). Cold webbing is stiff and harder to tension evenly.
- Double-check your pattern: Lay out all straps dry before fastening to confirm spacing and weave direction. Adjusting after stapling is difficult.
- Seal wood frames: If your frame is wood, apply a fresh coat of sealant after re-webbing to protect both the frame and the staple holes. See our outdoor furniture refinishing guide for step-by-step sealing instructions.
- Consider upgrading cushions: New webbing is the perfect time to replace worn cushions. Explore waterproof outdoor lounge chair cushions for a fully refreshed seating experience.
When to Repair vs Replace Your Furniture
Re-webbing is almost always worth it when the frame is structurally sound. However, there are situations where replacement makes more sense:
- Repair is best when: The frame is solid, the furniture is high-quality (teak, aluminum, or wrought iron), and you want to preserve a matching set.
- Replace when: The frame has significant rust, rot, or structural cracks. Multiple attachment points are broken. The cost of materials exceeds 50% of a new equivalent chair.
If you are evaluating whether to restore or replace a wooden set, our teak outdoor furniture guide and restoring teak outdoor furniture resources explain how to assess frame condition and estimate restoration value. For a broader overview of furniture longevity, see popular outdoor furniture brands known for frames that justify re-webbing.
Frequently Asked Questions
How long does replacement webbing last?
Quality UV-resistant polypropylene or polyester webbing typically lasts 5–8 years in full sun. Elastic webbing may last 3–5 years. Proper tension and rust-proof hardware extend lifespan significantly.
Can I replace webbing without removing the frame from the chair?
Yes, in most cases the frame stays intact. You only remove the old webbing and fasten new straps to the existing frame. However, removing the seat from the chair base can make the job easier and cleaner.
What is the best webbing width for patio chairs?
Most patio chairs use 2-inch wide webbing. Some use 1.5-inch or 2.5-inch. Measure your old webbing before ordering — width must match the frame attachment points.
Do I need special tools for metal frames?
Metal frames typically use clips, rivets, or screws rather than staples. You will need a drill, rivet gun, or screwdriver instead of a staple gun. The process is otherwise the same.
How tight should the new webbing be?
The webbing should be taut with minimal sag when you press it. It should give slightly under weight but return to shape. Over-tightening can stress the frame; under-tightening causes sagging.
Can I mix old and new webbing on the same chair?
It is not recommended. Old webbing has different stretch characteristics, which creates uneven support. Replace all straps at once for consistent comfort and appearance.
Final Thoughts: Restore Comfort, Save Money
Replacing furniture webbing straps is one of the most rewarding DIY repairs in outdoor furniture care. It costs a fraction of new furniture, takes only a few hours, and delivers immediate, visible results. With UV-resistant webbing and rust-proof hardware, your restored chairs can last another 5–8 years with minimal maintenance.
Before you begin, make sure you have the right materials and a clear plan. If your furniture also needs cushion upgrades, explore our waterproof cushion guides. If the frame needs refinishing, our refinishing guide covers that too. And if you are still deciding whether to repair or replace, our brand and material guides can help you make a confident decision.
Your outdoor seating is worth restoring — and with the steps above, you have everything you need to do it right.
Ready to Restore Your Outdoor Seating?
Browse our recommended replacement webbing, tools, and cushions to complete your project with confidence.
View Recommended ProductsRecommended Webbing Straps & Repair Supplies
⚠️ AFFILIATE DISCLOSURE: This website contains affiliate links. As an affiliate Associate, we earn from qualifying purchases. If you make a purchase through these links, we may receive a small commission at no additional cost to you. Read our full affiliate policy.

Chair Webbing, Upholstery Strapping, Furniture Repair Straps, 2IN x 40FT | Houseables Elastic Webbing for Furniture Upholstery Webbing for Chairs, Repair, Support, Sofa, Couch, Dining Seat, Belt
Check price on Amazon
KEPYDRMTF 2 Rolls Webbing Band Replacement for Chair, Couch, Sofa, Upholstery Seater Repair Material, Elastic, Latex, Stretchy Webbing Belt/Strap for Lawn Chair (Each Roll 6 Yard)
Check price on Amazon
YaeCCC Jute Webbing,Upholstery Webbing for Chair,3.5"x10Yd Upholstery Strap | 100% Jute Web Heavy Duty for Burlap Upholstery,Chair Repair&Crafts
Check price on Amazon
Upholstery Webbing Band Replacement for Chair, Couch, Sofa, 2ins × 32ft Roll, Upholstery Seater Repair Material, Elastic, Latex, Stretchy Webbing Belt/Strap for Lawn Chair
Check price on Amazon
ZHFMLY 2" Brown Wide Webbing Straps 12yd for Lawn Chair,Bag &Sewing | This polypropylene webbing is heavy-duty,perfect for replacing lawn chair straps, repairing backpacks & furniture tie-downs.
Check price on Amazon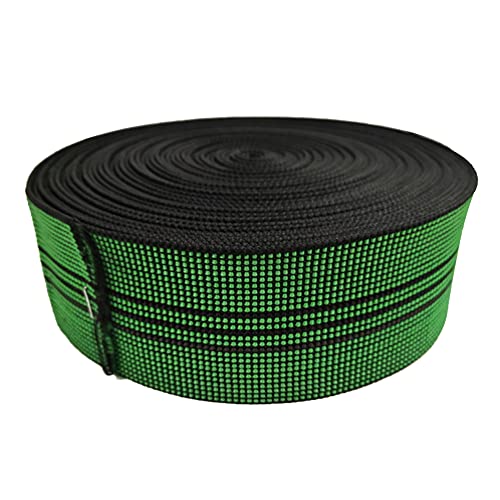
Upholstery Webbing Chair Couch Material Replacement,Elastic Webbing Latex Band, Stretchy Spring Alternative, Furniture Repair DIY Elasbelt 2" Wide (10m/32ft)
Check price on Amazon
PH PandaHall 16.4ft Upholstery Rubber Webbing Straps, 2 inch PU Leather Webbing Replacement Kit with 30pcs Fastener Furniture Repair Strap Kit for Repairing Sagging Couch Chair Patio Furniture
Check price on Amazon